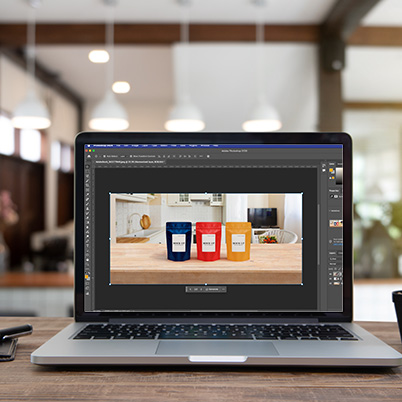
Ever tried combining images and ended up with something that looks a little… off? Photoshop’s Harmonize feature helps your composites and mockups look more realistic by automatically matching color, lighting, and shadows between images. It’s a huge time-saver when you want your design to feel natural and believable.
How to Use Harmonize in Photoshop
- Open your background image
- Go to File > Open and select the image you want to use as your background.
- Add your subject
- Choose File > Place Embedded to insert your subject image on a new layer above the background.
Tip: You can click Remove Background in the Contextual Task Bar to instantly remove the background from your subject.
- Select the correct layer
- In the Layers panel, click on the pixel layer that contains your subject.
- Harmonize only works on pixel layers—not text layers, adjustment layers, or smart objects.
- Resize and position your subject
Adjust the scale and placement so the subject fits naturally into the scene. - Apply Harmonize
Click Harmonize in the Contextual Task Bar and choose a variation you like.
Photoshop will generate the result on a new layer, so you can compare and tweak as needed.
Harmonize is perfect for mockups, posters, social media graphics, editorial illustrations, and creative class projects where realism makes your design stronger.
0:09 When you may want to use harmonize
00:30 Place Embedded
00:41 Remove background and scale
01:05 Select Harmonize from contextual task bar
01:35 Choose a generated option in the properties panel