Adobe Audition is a powerful tool for recording, editing, and mixing audio, whether you’re creating a podcast, voiceover, or sound design project. In this tutorial, we’ll walk through the essential setup steps so you can start recording with confidence. From organizing your files to fine-tuning your audio settings, you’ll be ready to capture high-quality sound in no time.
Keep Your Files Organized
As with any digital project, maintaining an organized file structure is key. For audio work, that means keeping all related files in one place. Your uncompressed WAV files should always stay with the PKF “sidecar” file. Store them together in the same folder, and you’ll avoid headaches later.
Set Up Your Workspace
Before diving in, make sure your workspace is arranged the way you need it. You can adjust your layout from the top bar or by using the Window menu. To revert to the default, choose Workspace > Reset to Safe Layout—you’ll also find this option in the right-hand menu.
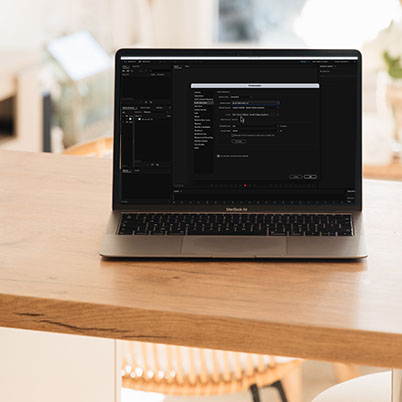
Check Your Audio Settings
Next, confirm your audio setup. Go to Audition Settings > Audio Hardware and select your microphone from the list. Double-check the rest of your audio preferences, then review your system settings to ensure your primary mic input level is between 9 and 12. Click OK, and you’re ready to start recording.