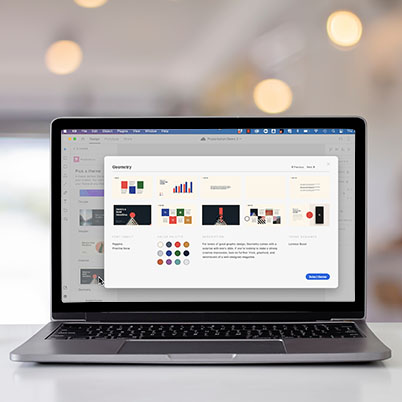
Presentation tools have always frustrated me, they seem clunky and not at all free for creativity. I also dislike the feeling of hunting around for icons, images and just the inefficiency of it. Enter XD for presentation, which has a sense for design and how design is an important element in telling stories.
Start a new doc and save to the cloud or the desktop (Cloud will allow real time collaboration).
Download the plug in from https://modular.adobe.com/presentation or through Creative Cloud. Once you get the plug in and install it into XD, the creativity begins.
Like any presentation tool, begin with a template and choose slides that work for what you need then customize. You have on board access to vector-based icons, shapes, photography, illustrations, and charts. No hunting online and linking visuals again. You can fully customize your template for your branding colors and fonts.
Step 1: Change your fonts
Make sure to change fonts before color when you customize slides. This customization will allow you to use your brand elements for a cohesive look. With the Document Assets panel open (icon that looks like bookmark on lower left), right-click on a text that you would like to change and choose “Reveal Character Style in Assets”. You will see this highlighted on the left. Then right-click what is highlighted and edit. Pick a new font. All of the slides will automatically update with these changes.
Step 2: Change the color palette
To change your colors, you simply need to change them in the Document Assets panel.
Step 3: Add new slides
Choose new slides to add to your deck via the slide menu. Use the dropdown menu to find new styles within each category. Click to add these. You can navigate around your slides by using the selection tool + spacebar to access the hand/move tool.
Step 4: Edit content
Use the elements menu to add images, illustrations and icons. I also like the plug in Icons for Design and Pexels to find other options. Preview your entire deck by using my presentation – add slides here too or move things around.
To play your presentation, click the play in the upper right hand corner – you can advance with your arrow keys. If you want more sizzle and interaction, let’s experiment.
Adding sizzle
Add elements such as lottie files, hyperlinked buttons and short videos.
To import your video into XD, drag it into a shape on an artboard. Videos need to be MP4s.
Once imported, the first frame of the video is displayed on canvas. When you select the video (you may need to double click) , you see a play icon in its upper-left corner.
To preview the video or adjust settings, click the button in the Video section. Here you can:
- Preview the video by clicking Play .
- Trim video, change thumbnail, set playback to loop, or disable audio.
- Control when your video will play by choosing a playback option
Collaborating and sharing
Use the coediting feature to share with your group by clicking the plus icon and invite to the document.
To share, simply share a link out.
Table of Contents:
00:39 – Adding the presentation plug in
01:25 – New Web size file
01:36 – Saving to cloud
01:52 – Collaboration with XD
02:15 – Opening Plugins panel
02:32 – Begin by picking a theme
03:12 – Using document asset
03:33 – Changing Fonts
04:51 – Changing color
05:34 – Adding more slides
05:48 – Option to switch themes
06:20 – Rename slides
06:29 – Adding icons and images
07:02 – Images from Presentation
07:22 – Images from desktop
08:02 – Replacing text
08:16 – Adding icons
08:37 – Other helpful plugins
09:50 – Looking at entire slide deck
10:16 – Previewing the deck
10:40 – Adding presentation sizzle
10:51 – Adding video
10:57 – Rules for adding video
12:29 – Video playback options
12:48 – Trimming video
12:59 – Loop playback
13:54 – Adding lottie files
14:42 – Adding buttons and hyperlinks
15:08 – Using alignment tools
16:29 – Co-edit feature
16:57 – Sharing final work
