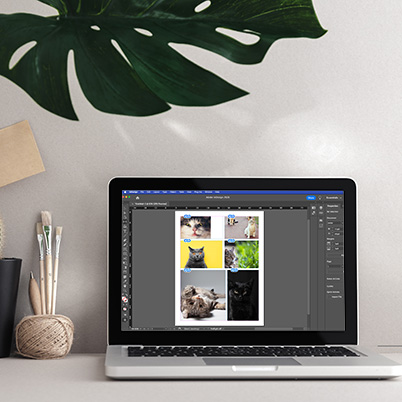
Want a quick, polished way to show off multiple photos—whether it’s for a portfolio, client presentation, or class project? This gridify technique in InDesign lets you build a photo grid in seconds and customize it like a pro.
Step 1: Build the grid
- Grab the Rectangle Frame Tool.
- Click and drag across your page.
- Without releasing your mouse, tap the Up Arrow to add rows and the Right Arrow to add columns.
Boom—you’ve just created a perfectly aligned grid of image frames.
Step 2: Drop in your photos
- Select all of the frames.
- Place your images (you can load multiple photos and click through the frames).
- If images don’t fit quite right, no stress.
With all images selected, go to Properties > Frame Fitting > Content-Aware Fit.
This automatically crops and scales your photos so they look balanced inside each frame.
Pro tip:
Go to InDesign > Preferences > General and set Fit Frame to Content as your default. Future you will be grateful.
Step 3: Customize spacing with the Gap Tool
Want to break away from a boring, perfectly even grid?
- Select the Gap Tool.
- Click and drag between frames to adjust spacing.
- Want to change just one gap (not the entire row or column)?
Hold Shift while dragging.
This is where your grid starts to feel intentional and designed—not cookie-cutter.
This technique is perfect for:
- Portfolios and personal brands
- Client presentations
- Photography or design showcases
- Social, editorial, or lookbook layouts
You end up with a clean, customizable photo grid that highlights your work and looks professional—without spending forever lining things up.
Try it once, and you’ll use it all the time.
00:28 Use rectangle frame tool and start drawing
00:32 Add up and right arrow keys to create rows and columns
01:02 Go to File, Place and select all the photos
01:17 Place photos and use right/left arrow key to move through set
01:38 Using content aware fit
02:32 Using the gap tool to change space between