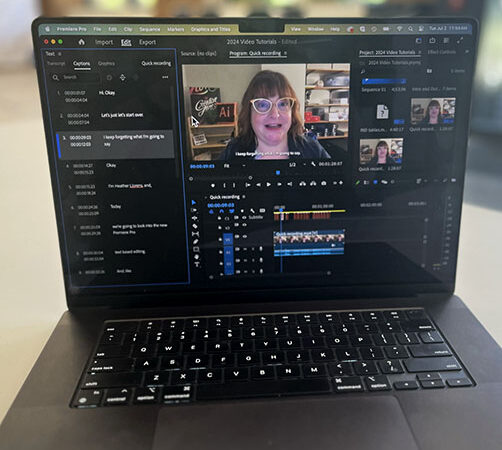
Text-based video editing in Premiere helps you speed up your workflow and get to a rough cut more quickly. With the transcript you can edit, move and mark clips.
Getting started
Begin text-based editing by transcribing the clip. You can transcribe content when you import by selecting automatic transcription.
If you have already imported content, be in Window > Workspaces > Text-Based Editing. In the Project panel, double-click the clips you want to transcribe. Next, select Transcribe in the Text panel.
With Text-Based Editing, copy and paste text to move clips in the sequence, delete pauses, and filler words.
Once satisfied with your rough cut, use video editing tools to trim and refine cuts, pacing, color grading, audio sweetening, and add titles or graphics. The sequence transcript serves as a navigation tool throughout your workflow, allowing for edits at any time.
When editing is complete, use the sequence transcript to generate captions for your video.
In the text panel, simply double click to edit the transcript.
Precise edits
One of my favorite features is the ability to remove pauses and other phrases from the transcript. Select the icon in the Transcript panel.
- Choose Text, Filler words, or Pauses to bulk delete.
- You can then choose to delete single instances or bulk delete any searched text, filler, or pauses.
You can also use this to add markers, perhaps if you need to add additional footage or Broll later.
- Select the three dots in the top-right corner of the Text panel.
- Select Transcript View Options and make sure the box next to Markers is checked.
- Right-click the text you wish to highlight in the Transcript panel and select Add Marker.
00:09 Text-based editing
00:39 How to generate a transcript
00:58 Text-based editing workspace
02:01 Moving clips around
02:33 Removing selections
03:25 Removing fillers and pauses
04:58 Adding markers in transcript
